Almost 20 years ago I bought 7 ha of land in the Alentejo, Portugal. The land is called "Retumbana-Nova" and shares a common border with Tamera. The land had an old rammed earth farm house which lay in ruins that has since been refurbished and enlarged. Today the house has become a beautiful natural building, self-sufficient in both energy and water that is rented out to visitors. The barren land surrounding the house had only a few old cork oaks and one Eucalyptus tree left. The land called out to be reforested. My long-term vision was to create a dense forest of high growth trees covering the surrounding hills. And thus, fifteen years ago Arnold Schonhardt and I began to reforest the land with nearly 30,000 trees using various planting methods and species.
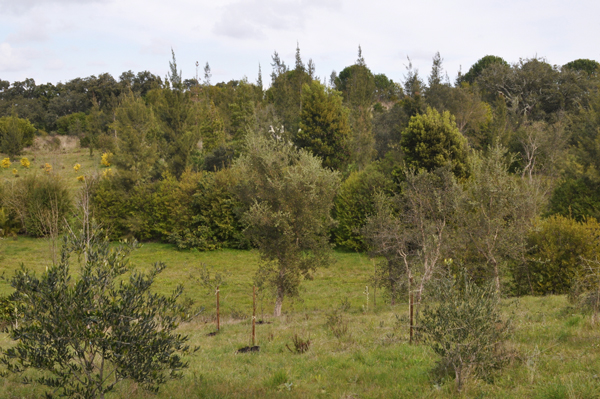
Reforested land in Portugal's Alentejo after 15 years.
Initially since we could not irrigate, only about half of the trees survived the very tough and dry summers of Alentejo. The depleted soil consists of acidic clay with humus washed down to the valleys. The winters are very wet and drown the plants and drench the land for some time. With frosty temperatures down to -7°C, winters also limit the choice of trees for reforestation. Adding to these challenges, most of the water runs off due to deforestation. To correct the later, we started building a water retention lake and a few ponds.
Finally after all these efforts a forest is covering the land but the fast growing species must be pruned to leave space and light for slower growing trees. As the danger of forest fires is high during the first critical phase of reforestation, all prunings and dry wood waste should be removed from the forest. Pruning the trees to a height of about 2 m lessons the chances of branches catching fire.
The larger branches provide excellent firewood while the brush was cut into short pieces and piled up to facilitate decomposition. However after years of doing this, the piles continue to grow in height and in number and the danger of fire grows as well. What we learned is that the periods of drought are too long for real composting to happen and the wet winters too cold for much soil activity. Perhaps later, when a good forest cover is established and the soil organisms have settled in again and grown in numbers, composting will work. For now the piles do not rot fast enough to help build the forest soil, let alone prevent fires.
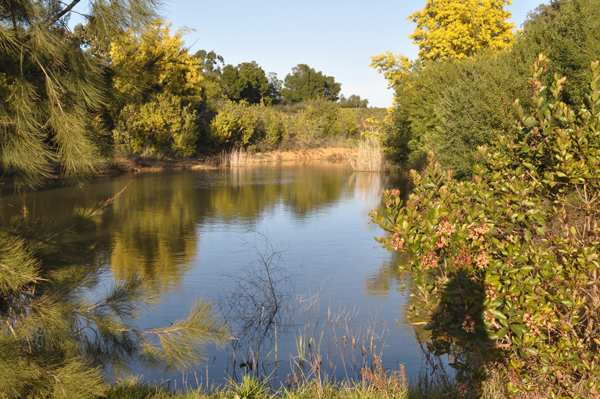
Water retention lake to irrigate the forest during summer in the first years.
We believe that terra preta may spark the change needed to promote composting of these prunings into organic material without dangerous build-up of dry organic material on the surface. The last two years we have been experimenting with terra preta technologies at ZEGG, a community eco-village in Northern Germany. On the very sandy soils that are ubiquitous in this region, very promising results have been observed. In Portugal, however, biochar is less available for us to kick start the terra preta process. An article by the Ithaka Institute about the Kon-Tiki kiln prompted the idea to try the open earth pyrolysis method. The earth kiln is a circular cone hole in the ground about 1 m deep with 45° angles and an upper diameter of about 2 m. This method could not be tried at ZEGG, as the sandy soil would not retain the required cone shape. But in the stony clay soil of Alentejo, the hole would be stable for many firings. An excavator made 8 such conical holes in different locations and we soon started firing the first one.
The article reads: In this method you take care to build a strong initial bed of flaming embers at the bottom of the hole in the ground, gradually, layer by layer you can add combustible material such as wood, food scraps, bones, leaves and straw while maintaining a smoke-consuming fire front. The burning pyrolysis gas consumes most of the oxygen drawn into the pit by the flame and therefore protects the pyrolysis zone, while the earthen walls keep air out from the sides and below. The fire itself is so effective at excluding air that the underlying layers outgas and char instead of burning to ash. After a few hours, by the steady piling and outgassing of fresh biomass, one or more cubic meters of biochar accumulate that can then be quenched by water or by a 5-10 cm thick layer of soil, sand or manure. (from: Kon-Tiki - The democratization of biochar production; Ithaka Journal)
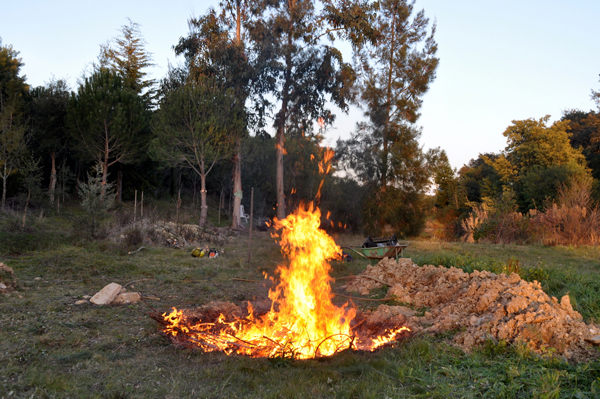
Kon-Tiki kiln in the soil
From the basic principle of smokeless fire (Kon-Tiki - The democratization of biochar production; Ithaka Journal):
If you layer a wood pile loosely, with enough small branches in the upper layer, and light it at the top, nearly all the resulting wood gas will pass through the overlying flame front and burn so there is only a clean, smoke free combustion gas. Radiant heat from the flame chars the wood beneath layer by layer. Air is drafted in from the sides of the pile, but is updrafted into the flame and consumed in combustion. Under the nearly oxygen-free fire front the char is mostly preserved. As the pyrolysis reduces the wood chunks to smaller pieces that pass down through the loose pile, fresh layers of wood are continually exposed to off-gassing heat below the fire front. By observing the flame and the onset of ash build up on the outer layers of the charred wood you can determine the right moment to quench with water or smother with dirt, and instead of producing ash alone, you may retain close to a fifth of the wood as charcoal.
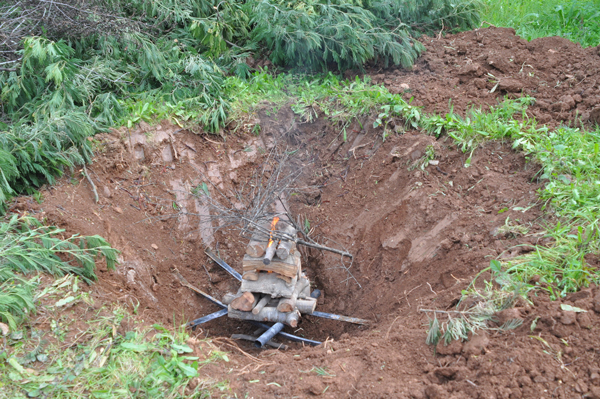
Start the fire from the top and only add new feedstock once you have a layer of glowing embers on the bottom of the hole.
Although initially skeptical, I pyrolyzed the surprisingly dry old shrub piles in the soil Kon-Tiki. Controlled burning seemed like the right thing to do to prevent forest fire. The initial phase of pre-firing until a hot bed of charing feedstock formed at the bottom of the kiln took 20 to 30 minutes. The fire then became really hot and fresh green prunings could be layered on the fire. With green material added it would smoke for a moment, but only briefly and then return to smokeless combustion. After 5 to 6 hours the soil kiln was filled with biochar and became ready to be queched. This first hole was quenched with water from a hose on the side of the hole so the quenching water would fill up from the bottom and the rising steam would purify the biochar.
The third time around the hole was located far from water so I quenched with soil and was surprised how easy and quickly it worked. The thin layer of soil became warm but not hot, nor did it even dry up completely. However, it was necessary to wait at least a day before the topsoil could be removed and the biochar extracted.
Now instead of the brush piles being merely carbon neutral from rotting or burning, when converted into biochar it becomes carbon negative through biochar's ability to sequester carbon. The brushwood does not have to be dried or shredded (further reducing energy requirements!) which makes this method the most energy efficient and least work intensive. Even pine needles can be charred in this manner. It is a pity to waste the heat, but in the Alentejo there is not much need for heating anyway.
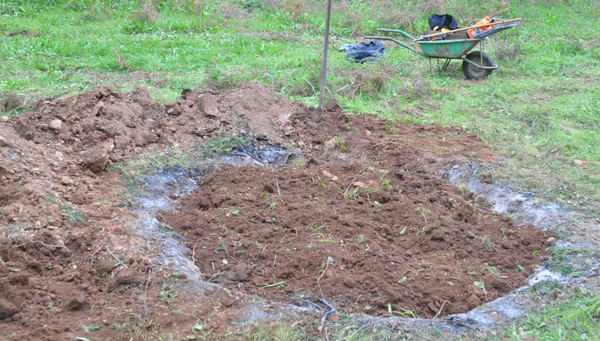
Under the soil quench layer: > 1 m3 of biochar
It has been well documented that fresh biochar should not be added to soil directly as it is nutrient hungry and would initially adsorb nutrients from the soil. Therefore to charge the biochar, it is first used in a compost toilet where it takes up Nitrogen, Phosphorus, and lacto-acid bacteria. It also helps reduce odors and thus increases our guest's acceptance of compost toilets.
More recently I have started adding it in the form of biochar dust to clay plaster to the walls in the house. Due to high humidity, the walls stay moist and often smell of mold. What is worse, is that plaster keeps falling off every few years. I cannot predict yet what will come of new biochar plaster covered walls, but it was good to work with this mixture and the smell has completely disappeared.
Once I had started to produce biochar with the Kon-Tiki technique on our land and fired 5 holes producing more than 5m³ of biochar, I had to transport and handle all these heaps of char. In this way biochar has now started to spread all over the land as parts drop off the wheelbarrow and shovel. At last the carbon age has returned to Retumbana-Nova in Alentejo.

If you quench the biochar with water you don't need to wait 24 hours before you can marvel at the beauty of fresh biochar!
Newly inspired and now returning to ZEGG in Germany, I will have a metal Kon-Tiki kiln built which can be moved to any type of feedstock. The ZEGG community has started collecting urine from waterless urinals, which will be used as quenching liquid to immediately charge the biochar and produce a potent organic fertilizer.
As biochar is currently very expensive in Germany, at least biochar made from responsible and sustainable sources, the payback period for the cost of building a metal kiln would happen after only 4 firings! As we are a community focused on self-sufficiency, the idea of making our own biochar is most attractive. We are confident that our ability to convert our various waste streams into fully charged biochar will help speed up the return to the carbon age at ZEGG. There are countless possibilities for different uses and entrepreneurial outlets for the biochar we plan to produce. Already we are planning to use it as bedding for the horse stable, for plaster in humid places and of course as we have done already, to help produce Terra Preta soils.
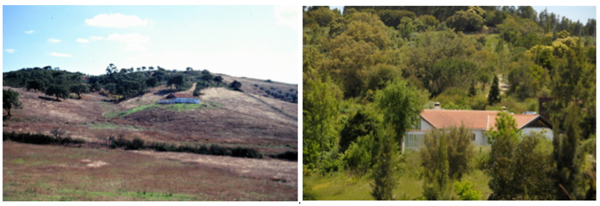
The picture on the left side shows the surrounding of the old clay house in 1996 before the reforestation. The right picture shows the same place in 2014.

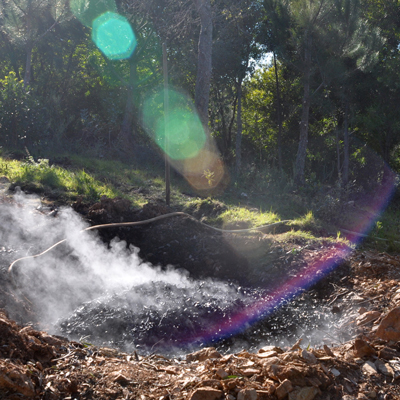
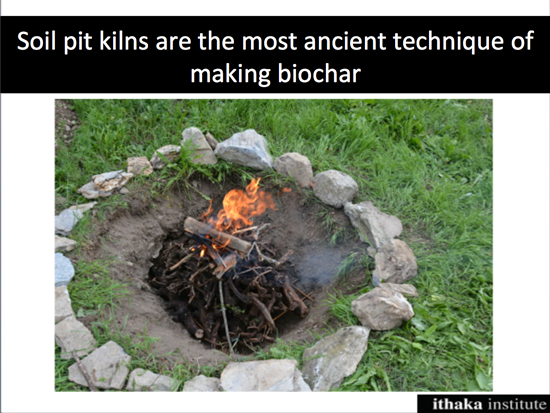
pits and trenches
cool project. I've used a cone pit like these (8 feet / 2.5 meter) and also sloped sided trenches. I have found the trenches to be better for burning brush and slash because almost any length can be fit in the pit very well without cutting. Even pieces that are longer then the trench can be burned off and the ends thrown back in the fire. The round hole just isn't the shape of the stuff I'm burning, so it seemed to create more work or poorer results, at least with the material I'm using and the way I burn. Maybe I'm missing something, but at this point, I see the trench shape as better for wild brush and the cone as better for smaller wood that is already cut up, unless you are using the cone shape for a planting site. There is some smoke, as you say when material is first added, but not too much, and it seems to handle green wood okay in small diameters, though there is a little more smoke than when using dry wood, as would be expected. I tend to put more dense stocks in the pit, up to about 4 inches diameter, and pile the twiggy and smaller brush in open piles to light from the top and that works okay for me as a system so far. I've also thought about char incorporation in forested situations using trenches, by digging the trenches on contour and burning the charcoal in the trench and just burying it. The soil dug out can be tossed on the downhill side, effectively making the pit deeper for burning with less digging. Mixing soil in with the burning embers puts them out. My one experiment with this went pretty well. It's clear that it would take a lot of time to do any significant area, but I'm thinking in the long term, not short term. As a regular practice, it would certainly add up. I don't think in that sort of case that it's necessary to worry about the nitrogen sink effect as it will sort itself out soon enough. the trenches could also double as water retaining swales where that is appropriate. I don't think it is here usually for various reasons, and maybe not there either if you have clay soils in a mediterranean climate with significant summer winter rains, but where appropriate, the char could be extinguished and left in the open swales to eventually be covered as the swales blend back in over time. I think there is a lot of possibility there for reforestation and tree establishment if we come to understand what we are working with and experiment creatively. I think a lot of it will come down to what is practical in terms of labor v.s. results and that can only be known for sure by messing about with it all. I've also done a cone pit and planted a tree in the pit after back mixing the charcoal, which probably ended up about 10%, no more than 15%. That apple tree is the best growing tree on the property at this point. I think I put in one 5 gallon bucket of urine which, judging by the leaves of the tree and rapid growth, seemed to be enough to offset the nutrient sink effect. Whether the tree's good growth is due to the char, or just soil aeration, or the nutrient release from the ash (and the urine) is unknown, but it is growing really well. That might be a strategy for select tree sites, like planning out roughly where mature well spaced trees would grow and firing pits for each of those larger trees like oak and chestnut, while smaller stuff is planted in between to cover the ground and of course provide more char stock. Reforestation isn't an issue here, I'm just cleaning up the forest, thinning and limbing up stuff, but those strategies might be better suited to what you're doing once you have a momentum going to produce slash for charring, which it sounds like you do.